The Alpha A7 III sits on the bottom rung of Sony’s full-frame mirrorless camera range, and is designed to appeal to both keen enthusiast photographers and professionals. It’s no surprise to see 4K video capture on the Alpha A7 III. Recording in 24p, the full full width of the sensor is used, with full pixel readout and without pixel binning. It supports 4K capture at 60 or 100Mbps using the XAVC S 4K codec at your choice of 24 or 30fps. The 24fps video uses the full width of the frame, but there is a modest crop applied when shooting at 30fps. Dropping down to Full HD gives you 50 or 100Mbs options at 24, 30, or 60p, and there is an in-camera slow-motion option at 60 or 100Mbps and 120fps.

From the Sony A7 III specs, we know it uses Sony’s new XAVC S codec to record video files and package them in an .mp4 wrapper. It achieves a high data compression rate although, this codec is difficult for video editing programs including FCP X to recognize and support. To make a smooth editing the A7 III footage in Final Cut Pro, the easy and quick workaround is to transcode the XAVC S 4k video to FCP more editing-friendly format and then imported the converted video to Final Cut Pro (FCP X, FCP 7, FCP 6) for editing.
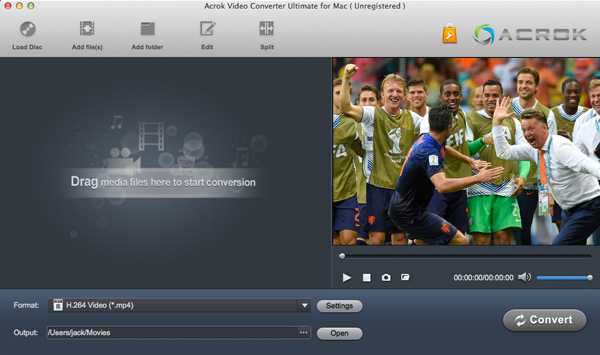
To finish the task, Acrok Video Converter Ultimate is highly recommended. With it, you can effortlessly rewrap and convert Sony Alpha A7 III XAVC S to ProRes Codec encoded MOV, which ensures maximum editing quality and efficiency when working with FCP X. Besides, the program also export other various professinal encoders – AIC, DNxHD, MPEG-2, H.265, allowing people to convert any 4K files to seamlessly fit your professional editing software.
Transcode Sony A7 III XAVC S files for Editing in FCP X
Step 1: Add Videos
Download, install and launch Mac 4K Video Converter as a XAVC S Video Converter for FCP X. When its main interface comes up, click “Add File” to load your source media.

Step 2: Choose Output Format
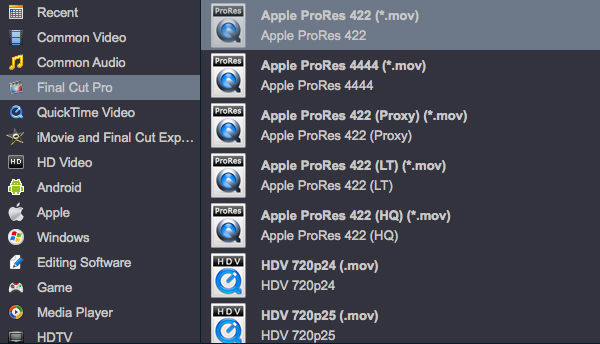
To convert Sony A7 III 4K video for FCP X, from “Format” list, choose “Final Cut Pro” category then select “Apple ProRes 422 (*.mov)” as output format under. This output format is also suitable for editing in iMovie.

Step 3: Editing and Settings (Optional)
Custom video and audio settings (optional). If necessary, you can click “Settings” button and go to “Profiles Settings” panel to modify video and audio settings like video encoder, resolution, video bit rate, frame rate, aspect ratio, audio encoder, sample rate, audio bit rate, and audio channels.
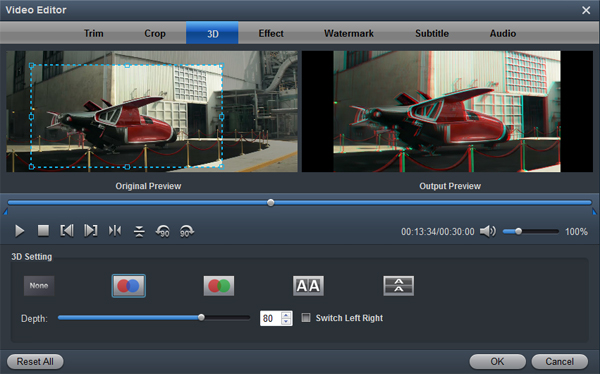
This Professinal 4K conversion software has simple video editing functions. You are allowed to use the built-in editor to adjust the brightness, saturation, hue and contrast of the original video, add watermark to protect it from being copied, cut or merge 4K video files. You can even convert the 2D video to 3D. It meets your basic requirements of video editing.

Step 4: Start Converting Videos
Begin Alpha A7 III 4K XAVC S to ProRes .MOV Conversion on Mac. When ready, click “Convert” button to start format conversion. Once the conversion process is complete, you can click “Open” button to get the generated ProRes 422 MOV files for editing in FCP X with optimum performance after transferring the files to FCP X as usual. Let’s have a try!

No responses yet